6. After
confirming that the cap is securely soldered, reassemble
the mic and you are done with this part of the
modification.
Step Three: More Audio by
Increasing the Deviation of the FT8900
The final step to raising the audio level of the FT8900
involves accessing the service menu and increasing the
deviation setting. I would urge you to record your factory
settings before you adjust them, should you wish to set
the rig back to its stock setting for some reason. I ended
up setting all bands to the maximum setting in the service
menu, and this resulted in full 5 kc deviation on all
bands except for 10m, which hits the wall at approximately
3.1 kc. The procedure for deviation adjustment is below:
FT-8900 Entering the
Alignment Mode:
A. Press and hold in the “Left” band (V/M) key and
the Hyper Memory #6 key while turning the radio
on. Once the radio is
powered up, release these two keys.
B. Press the following front panel keys in sequence
from left to right:
Left Side [LOW]
[V/M] [HM] [SCN] Right Side
[LOW] [V/M] [HM] [SCN]
C. You will now see “A-0 REF .xxH” on the display.
This signifies that the transceiver is now in the
“Alignment” mode.
FT-8900 TX Deviation
Adjustment (A-4 DEV): Note that user menu item 43 should
be set to WIDE.
A. Press the “Sub” band DIAL knob momentarily,
if needed, to switch the “Main” band to the
“Right”
side. If “Main”
already appears on the “Right” side, then proceed to the
next step.
B. Tune the “Right” band frequency to 440.050
MHz, then set the Transmit Power Level to “LOW”.
C. Press and hold in the “Left” DIAL knob
momentarily to step through the A-0, A-1, A-2, A-3
alignment menus until
you arrive at the alignment parameter that reads “A-4 DEV
.xxH.”
D. Inject a 1 kHz audio tone at a level of 50
mV from an Audio Generator. If you don't have an audio
generator, read on.
E. Press the PTT switch to activate the
transmitter and adjust the “Left” DIAL knob, as needed, so
that
the deviation meter
reading is 4.5 kHz. If no Audio Generator is available
adjust the deviation setting to (DEV.3FH).
F. Tune the “Right” band frequency to 146.050
MHz, then set the Transmit Power Level to “LOW”.
G. Press the PTT switch to activate the
transmitter, and adjust the “Left” DIAL knob, as needed,
so that
the deviation meter
reading is 4.5 kHz. Again, if no Audio
Generator is available adjust the deviation setting to (DEV.3FH).
H. Press the “Left” DIAL knob momentarily to
switch the “Main” band to the “Left” side.
I. Tune the “Left” band frequency to
52.050 MHz, then set the Transmit Power Level to “LOW”.
J. Press the PTT switch to activate the
transmitter, and adjust the “Right” DIAL knob as needed,
so that
the deviation meter reading
is 4.5 kHz. Again, if no Audio Generator is
available adjust the deviation setting to (DEV.3FH).
K. Tune the “Left” band frequency to 29.050 MHz,
then set the Transmit Power Level to “LOW”.
L. Press the PTT switch to activate the
transmitter, and adjust the “Right” DIAL knob to the
maximum
value available (DEV.3FH).
This will increase your deviation on 10 meters to just a
bit over 3 kHz.
M. Turn off the FT-8900 and then power on as you
would normally, to operate as usual.
Summary of the Audio
Modifications
The end result of the acoustic improvement, heavier
coupling capacitance, and deviation adjustments, should be
a much fuller sounding transmit signal. I have been very
pleased with the audio reports I have received since
completing the changes. Reports indicate that the FT8900
sounds very natural, with a good balance of highs and lows
throughout the voice frequencies. Best of all, it is
simply much louder and easier for other stations to hear.
Audio clips in mp3 format of my FT8900 and MH48 before and
after modification are below, along with an Adobe Audition
screenshot of each of their waveforms.
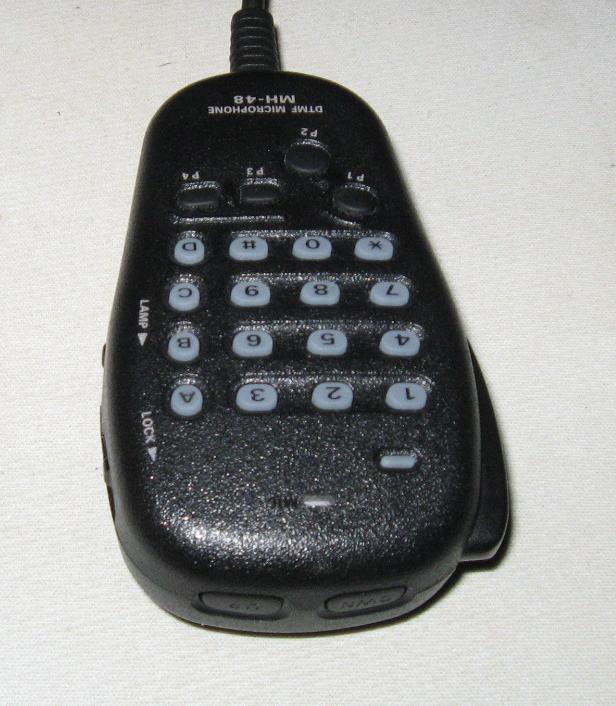
Modified MH48
microphone with front port slotted, 10uf coupling cap,
and deviation set to DEV.3FH
The total time for modifying each mic and adjusting each
of my FT8900 rigs was about 45 minutes, but then again, I
have never been accused of rushing anything, and my
experience with surface mount construction is very
limited, so chances are you will get it done faster.
Disclaimer: This modification is offered in the
spirit of Ham Radio experimentation. If you end up
damaging or destroying your MH-48A6J or any other
equipment, I am not responsible.


