PowerSDR Skins Tutorial - W1AEX
Important
Copyright Information - Please read before beginning
Before you begin, it's very important to
understand that PowerSDR contains some components which are
recognized as open source, and other components such as the
provided skins, which are expressly listed as copyright protected
material at the bottom of the Flex
EULA. (Reference SECTION B: FLEXRADIO SYSTEMS TRADEMARK AND COPYRIGHT
NOTICES) Therefore, it
would be very unwise to take components from the copyright
protected graphics files in the skins provided by Flex, modify
them, call them your own, and then distribute them. To avoid this
issue, I used Adobe Photoshop to create all the required console
graphics files from scratch. This includes the console panel
files, the ON and OFF states of each button, and the background
slides for the adjustable components on the front panel of the
user interface. This was a fairly tedious task, as there are
around 400 individual graphic files involved, but what the heck,
you can have my custom file templates for nothing! To be honest,
there are not that many different shapes required, and PowerSDR is
very forgiving and will compress or stretch whatever graphic you
provide to fit the space assigned to a particular file. Rest
assured that all the buttons, sliders, and console pieces in the
template packs will work fine! So, to be perfectly clear, you
should NOT modify any skin files provided by Flex! You absolutely
DO have my permission to use or modify anything I have created
here and I don't care what you do with it.
1. Making
the Console Panels
To create your own graphics for PowerSDR, you will need
software that is capable of manipulating PNG files. I use an old
version of Adobe Photoshop (version 6.0) but there are many other
programs that can do the basic tasks that are necessary for this
project. If you have a digital camera, it's very likely that it
came with graphics editing software that might have the ability to
work with the PNG format. There are 3 different types of
components found within the Console folder of each PowerSDR skin.
Those components include 10 Console "panels" that form the
background of the GUI, hundreds of "buttons" that toggle functions
ON and OFF, and 15 "sliders" for adjusting levels of
various parameters in the PowerSDR interface. The
easiest of the three components to work with is the collection of
10 Console panels that give PowerSDR its most visible
characteristics. The panels actually have the greatest impact on
the appearance of a skin, so it makes sense to start with them. To
edit these files, download the W1AEX_console_templates.zip
file, unzip it, and open up all 10 of the template files in your
graphics program. The console templates pack contains console
panels that are used in the W1AEX AL82 skin pack. The picture
below shows the color, relative size, and the shape of each panel.

The easiest way to create a new look is to import colors of your
choosing into the panels and then copy them into one of the skins
you downloaded from here. When you restart PowerSDR and select
that skin, you'll end up with something that looks entirely
different. If you want to get really creative, as an alternative,
you can use your digital camera to grab a color or a texture that
you would like, and simply cut and paste those into the panels. The
screenshot below shows a black wrinkle version of PowerSDR that
was made by taking a photo of the rack that houses one of my
vintage transmitters and then pasting the black wrinkle texture
into the ten panels that form the console. I did apply some
Photoshop filters on these textures to even them out, but it
actually looked pretty good with the raw photo textures. When
loaded into PowerSDR, the "panelModeSpecific" parts of the console
do not expand as much as the main Console.png or the
picDisplay.png file. This will cause textured graphics to not
appear uniform when they are displayed in PowerSDR, so to
compensate, I used a Console.png file that was 1024x600 so that
PowerSDR would not need to expand it to fill the minimum screen
size and simply made the picDisplay.png file that forms the
background of the Panadapter display dark black. If you want to
see what a texture skin like this one looks like at your own
station, create a new folder named Wrinkle inside the PowerSDR
Skins folder, create a Console sub folder, then download the W1AEX_black_wrinkle.zip
file (1.3 mb in size) and unzip it into the Console subfolder.
When you restart PowerSDR you will see "Wrinkle" as an option in
the Skins selection window of PowerSDR and when you select it,
your PowerSDR interface will match my old vintage equipment rack
like the picture below. The possiblities are endless
and limited only by your imagination. Keep in mind
that PowerSDR is very forgiving with the panel sizes and will take
just about everything you throw in there and make it work, as long
as the file name is correct!
2. Making
the Control Buttons
Once you have mastered manipulating the Console panel files,
you might want to take a shot at designing your own buttons and
sliders. Creating your own custom button set is a
fairly large task as each button requires an ON and an OFF graphic
as well as an RX1 and RX2 version for each function! Fortunately,
one size is used for most of the buttons, and PowerSDR simply
overlays the text onto whatever background you provide. The
picture below shows the different types of shapes you will
encounter if you decide to give this a shot. The two buttons at
the top that are enlarged are used for almost all of the functions
in PowerSDR. The enlarged orange bar on the right is actually the
LED that is added as a layer to a plain black button to create the
ON state when you press a button. The black notches in the corners
soften the shape of the illuminated LED and add a little realism
to the appearance of the front panel of PowerSDR. The buttons on
the left with lettering on them are "special" in that PowerSDR
does not overlay text onto them. I did my best to try to match the
font in PowerSDR but from the screenshots on this page you can
probably see that they are just a bit "off" and that I need to
keep working on them! When you press the REC button in PowerSDR it
brightly lights up like the REC image next to the OFF state
button. The elongated buttons are used for the MultiRX function
and also in the FM panel for the CTCSS, VAC, and MEMORY buttons.
The little square buttons at the lower left are used for the RIT
and XIT buttons. I found that it was helpful to have those two
buttons announce themselves brightly when they were ON to prevent
me from operating with them engaged by mistake. You are welcome to
use any of my button sets
as forms to create your own set of buttons. The picture below
shows parts of the simple set of orange buttons that appear in the
Kenwood TS-590 skin that is available for download.

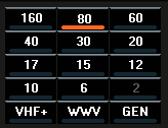
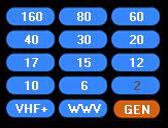
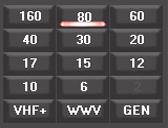
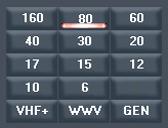
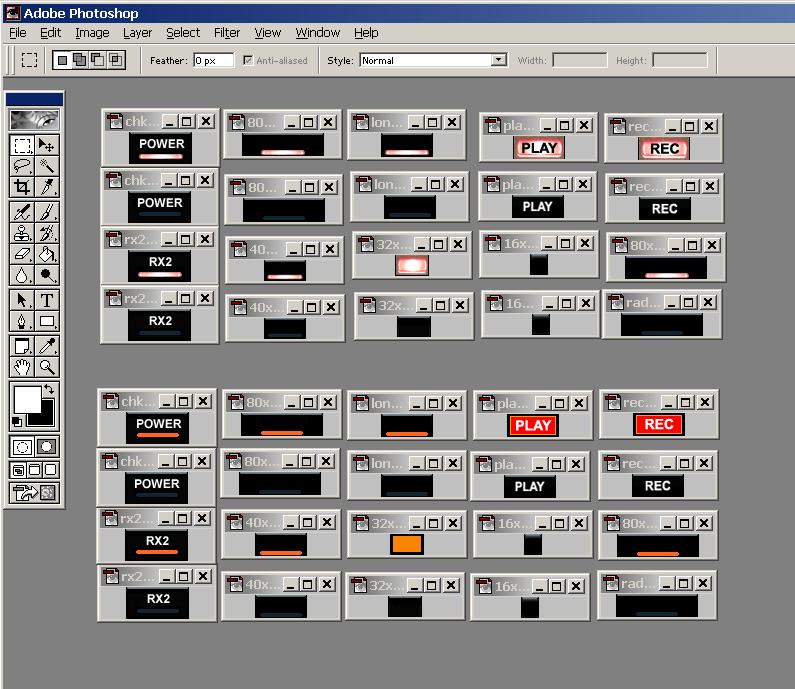
The next picture shows the two first sets of buttons that I
created for my skins. The orange button set at the bottom was
created by hand in Photoshop. The bright button set at the top was
created by taking a photograph of the bright "Charge" light on my
office desk phone and then using that to create the lighting
effect for each button when it is switched on. I really like the
effect it gives on the retro skins such as the Black Wrinkle,
National, and Collins skins. You can switch to any button pack
with any skin simply by unzipping the desired button pack into any
existing skin and allowing it to overwrite the existing buttons. I
finally got around to writing up a batch file that allows me to
make a small number of "base" files and then executing the batch
file creates the whole set of +300 button graphic files. That
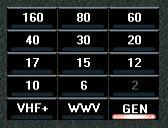
makes life much simpler! There are five different button packs
available for download by clicking the link under each small
sample picture down below.
Note: These button packs are
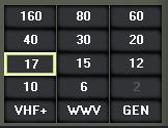
compatible with all the free skin packs on the download page.
Download
W1AEX SmartSDR 2 Button Pack
 Download
W1AEX SINCGARS Military Button Pack
3. Making the Variable
Control Sliders
The last component to play
around with is the graphic set that forms the sliders for the
variable adjustments in the user interface of PowerSDR. Each
slider has a "slide back" which is the slot that the virtual
control moves in, and a "slide head" which is the little
button that is moved to set the value of the slide control. I
started out by making the simple flat slider set below. I have
found that I prefer darker colored consoles that make
PowerSDR's white over-lay text stand out clearly. That's the
text that PowerSDR writes on the console panels to display
your Mic gain, Drive level, and other such information that is
variable. The simple, flat-looking dark slider below seemed to
blend in quite well with my early attempts at making custom
skins. You can download a set of these by clicking on the link
above the picture.
Simple
W1AEX Dark Slider

If you decide to experiment with lighter colored console
panels, you will most likely find that the dark sliders stand out
too much. To avoid this distracting contrast, I created a light
set of sliders to use with console panels that are lighter in
color. Again, my first attempt at these was not too exciting and
was made using simple, flat graphics as seen in the picture below.
Feel free to grab this set by clicking the link above the graphic
if you would like to mess around with them.

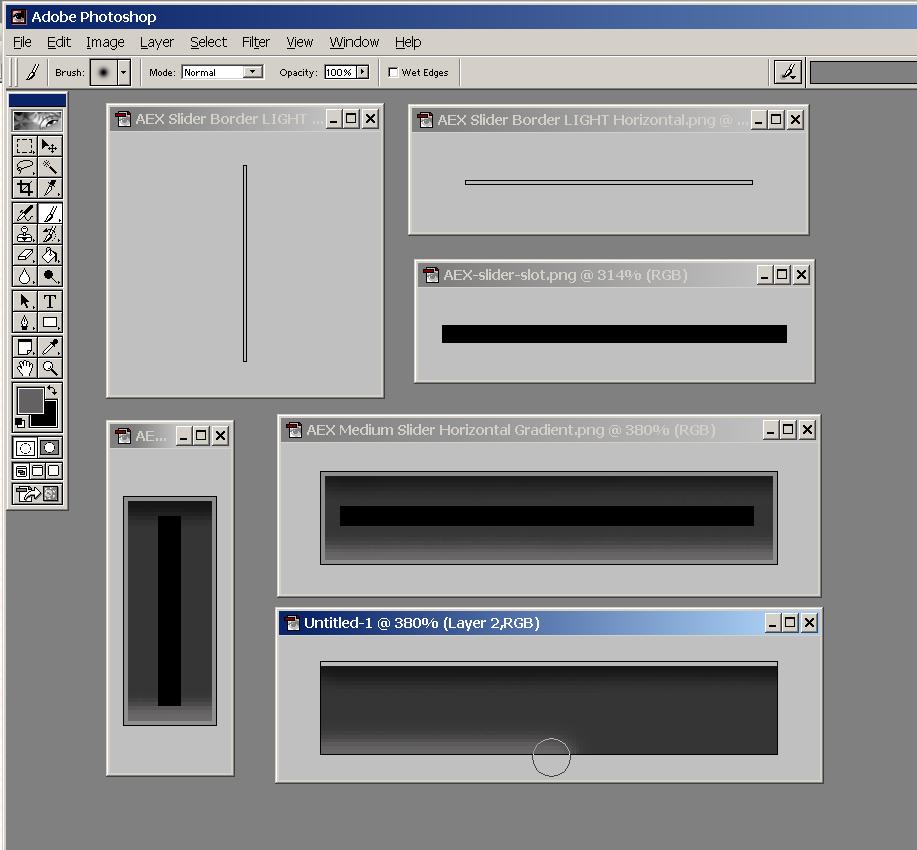
It wasn't long before I experimented with the "Airbrush Tool" in
Photoshop and found that it wasn't very difficult to make sliders
that had a three-dimensional and recessed look. After playing
around with this for a while, I settled on making a dark, medium,
and light set of sliders to allow blending with a wider variety of
console colors. If you look at the three "Mesh Skins" on the
download page you can see pictures of what each slider set looks
like when installed with consoles where they are most appropriate.
The picture below shows the various graphic pieces that are
created and assembled in layers to create the sliders. If you
would like to use them, feel free to download the three gradient
slider packs at the links below the picture. To install a slider
pack into an existing skin, simply unzip it into the Console
directory for that skin and let the slider graphics files
overwrite the ones you are replacing. When you restart PowerSDR
they will appear when that skin is selected.
W1AEX
Light Gradient Slider Pack
 W1AEX
Medium Gradient Slider Pack
 W1AEX
Dark Gradient Slider Pack

I received an email with a
suggestion that the sliders might look better if the slots
were made less obvious. After giving it some thought, I have
to agree that they might be much thicker than necessary. The
three gradient packs below are identical to the gradient packs
above, except that the slots are about half as wide. It you
like how they look, simply download and unzip them into the
console directory of an installed skin, and allow them to
overwrite the existing slider files. I have installed them in
several different skins, and I think I'm beginning to like the
narrower slots better. The two "Metallic" skins pictured in
the download list will give you an idea of how they look. At
any rate, you can choose what you like and go with it! As
always, if you have suggestions or ideas for enhancements,
feel free to contact me at the email address that appears at
the top and bottom of the page.

SUMMARY: That's pretty much
all you need to know to give your PowerSDR interface a custom
look. The short story is that if you combine 10 console panels
with a button pack and a slider pack, you will have a complete
skin. That's all there is to it. Hopefully, you will come up
with something great to share with the entire Flex community. If
I come up with anything that looks decent I'll stick additional
file packs and screenshots in the section below. Feel free to
share anything you make with my graphics packs, but remember
that the original graphics files in PowerSDR should not be
distributed without permission from Flex or the individuals who
created them. Have fun!
Rob -
W1AEX


