Installing Custom PowerSDR Skins - W1AEX
There are two factors that affect where the PowerSDR skins will be
found on your computer. The first variable is the operating system
you are using. Windows XP, Windows Vista, and Windows 7 store the
skins folder in different places. I have no idea where they are in
Windows 8 so I'll wait to hear from someone who has located them
in that platform. The second variable is the version of PowerSDR
that you are using. With early 2.x.x versions up through version
2.3.5 the Skins location moved around as PowerSDR matured. Then,
beginning with version 2.4.4 the location was moved out of the
Windows User Login account to the All Users account to allow
access to the program for all users of a particular computer. To
be honest, the hardest part of installing a custom skin is
locating the current location of the Skins folder on your system.
When you have found it you are pretty much on your way.
NOTE: If you are working from a Windows user account with a
privilege level less than "administrator" you are likely to find
that you do not have the necessary access to create folders and
files in the area of the file system where the skins reside. It
will most likely be necessary to work from an account with
administrator status. Also, before you begin following the
steps below, make sure that you exit from PowerSDR. When PowerSDR
is running, it locks the skin files it is currently displaying and
it also will not recognize any new skins folders that you install
if they were not present when it was started up. So, it is best
practice to exit PowerSDR before you make the changes suggested
below.
NOTE: It is my understanding that Vista uses the same file
structure as Windows 7 but I cannot confirm that since none of my
machines use Vista.
Be aware that it might not be possible to see the skins folders
and files unless you enable "Show
hidden files, folders, and drives" in the Folder Options
"View" tab, so keep that
in mind. You can reach the Folder Options window by typing Folder Options into the Start
Button search box.
The Skins directory for PowerSDR versions 2.4.4 through the
current version can be found below:
In Windows 7 the path to the skins files
is: C:\Program
Data\FlexRadio Systems\PowerSDR\Skins
In Windows XP the path to the skins files
is: C:\Documents
and Settings\All Users\Application Data\Flex Radio
Systems\PowerSDR\Skins
The Skins directory for PowerSDR versions 2.3.5 and earlier
moved around as PowerSDR matured but the paths below should
point you in the right direction:
In Windows 7 the path to the skins files in older versions
was: C:\Users\your windows login account name\AppData\Roaming\FlexRadio
Systems\PowerSDR\skins
In Windows XP the path to the skins files in older versions
was: C:\Documents and
Settings\look in all the user
accounts for the rest of the path\Application
Data\FlexRadio Systems\PowerSDR\Skins
When you have located the PowerSDR "Skins" folder it would be wise
to study the folder heirarchy used by PowerSDR when it loads each
skin. Note that each skin has its own master folder which is used
to name the skin and another subfolder named "Console" where all
the skin files reside. To install a skin you will create your own
custom folder (for each new skin) with a name of your choice, and
then a "Console" subfolder to unzip all the skin files into.
To install a new skin simply follow these steps:
1. Make sure PowerSDR is closed.
2. Locate the Skins folder.
3. Create a new folder inside the Skins folder and
name it with the skin name you want displayed in the Skins list
inside PowerSDR.
4. Create a new subfolder inside the folder you just
made and name this subfolder Console.
5. Unzip the PowerSDR skin zip file you downloaded
right into the new Console subfolder you just created.
6. Start PowerSDR and select your new skin in the
list in the "Appearance" tab.
That's all there is to it. If you cannot find your new skin in the
list then you have created your folders in the wrong place. If
your skin appears in the list but it does not load correctly, you
have unzipped all the skin files into the wrong folder instead of
into the Console folder. Find them and move them into the Console
folder and it should be fine. The simple example below might
clarify the wordy description above.
In the file structure screenshot below, I have created a folder
named W1AEX AL82 and a subfolder named Console that will be the
destination for the 400 graphics files in the next step. The
Console panel files for this particular skin were made by taking a
photograph of the front panel of my AL-82 amplifier and then
importing the color of that front panel into the 10 console panel
files that fill in the front of the Power SDR GUI. The panel for
the background of the panadapter was lightened slightly to make it
stand out a bit from the dark console. This is a very simple
"flat" skin with no shaded texture in the panels, but it's a
perfect way to start out.

To install this skin, download the W1AEX_al82.zip
file (.75 mb in size) and unzip it into the Console folder you
made. The W1AEX_al82.zip file contains a complete custom skin,
which includes a set of around 400 PNG graphics files designated
as console panels, buttons, and sliders. After installing the
files for this custom skin, when you start up PowerSDR, the name
you assigned to your custom folder should appear in the Skins
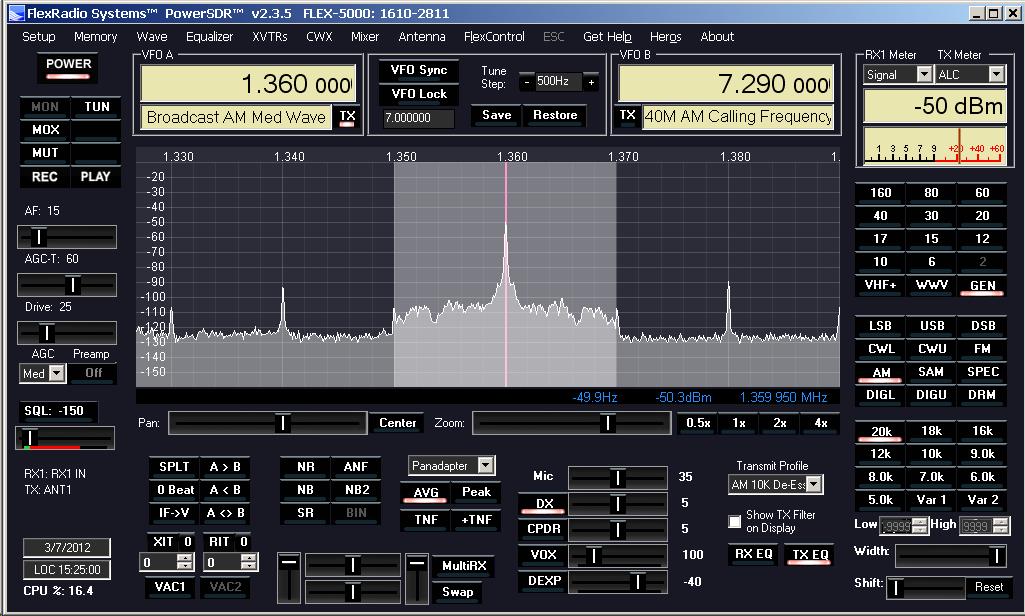
list, and when you select it, PowerSDR will switch to the skin
shown below:
Troubleshooting Note: If the skin
does not appear correctly when it is selected in PowerSDR then
you have not placed the skin pack files correctly. Go to the Troubleshooting
Page for help with the skins folders and file placement.


